
Hello friends!
Today is the beginning of a 'Twelve Days of Christmas' tag series!
Here is tag number one!

First, start by printing and cutting out this sweet vintage image.

I am using a manila tag that measures 3" x 6". I inked it with Vintage Photo Distress Ink to look aged. 2 strips of red cardstock punched with a Martha Stewart border punch are glued to the ends of a piece of scrapbook paper by October Afternoon and glued to the center of the tag. Glue the image onto the tag but don't put glue all the way to the edges as you will be tucking in embellishments under the edge of her dress.

I cut a white paper scallop and adhered a scalloped sticker from October Afternoon to the center. Add a Christmas sentiment to the center and glue scallop to the tag, tucking underneath her dress and arm.

To add more detail, I used red glitter glue to outline the inner scallop. I recommend Martha Stewart's Glitter glue.

I then took mini adhesive white pearls and added them around the red scallop.

I took a snowflake button (found at Hobby Lobby) tied with a pink bow and glued it between the dress and scallop. Another strip of red cardstock punched with a border punch was added along the bottom. I also used a white gel pen to add stitch lines around the edge of the tag.

A sparkly little chipboard poinsettia finishes off the bottom of the tag.

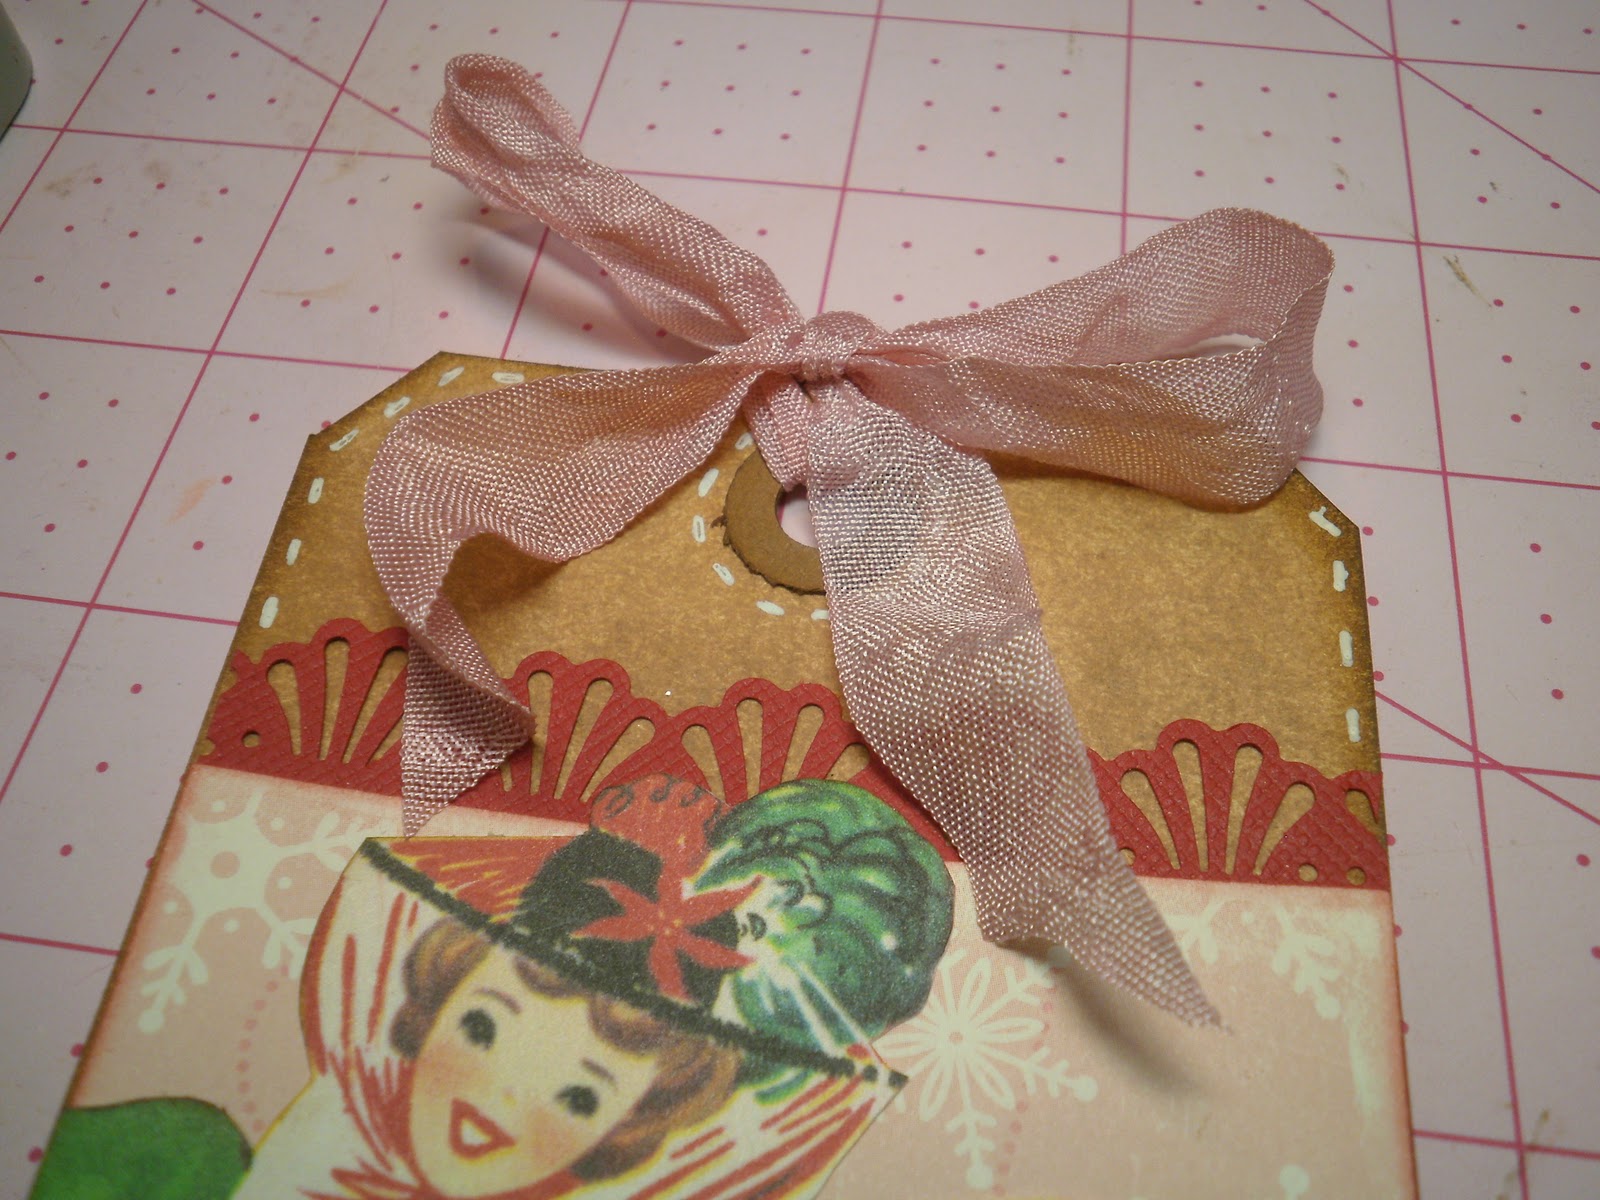
Add a bow to the top of the tag to finish it.
I made my bow by dying seam binding with Spun Sugar distress ink.
If you would like some of the seam binding but don't want to make it yourself, check out our etsy shop where I have listed this some in our Sugar Kissed colors.
I hope you have enjoyed this tutorial!

Wishing you a lovely day, Lindsey


.jpg)


.jpeg)


.jpg)


.jpg)


12 comments:
This is so sugar kissed sweet! I like it so much that I am going to make myself one, thanks Twyla, Marilyn
Oh what a great idea, tags for the 12 days of Christmas. I am going ot see if I can get the picture printed and make one of these! Thank you so much!
Hugs
Cxxx
Beautiful! I am going to try this one:) Have a blessed day, HUGS!
"Deck the Holly"
Now you know I like that!
I love this image, Lyndsey. Thanks for sharing. I just wish my printer didn't make me cry! ♥
What a beautiful tag... I love the poodle peeking around the corner!
Absolutely adorable as usual!!! Thanks for the tute!!!!
Very cute tag! I am excited to see your other tags. I have to do a little crafting everyday or I get grouchy. Ha!
Oh I surely did enjoy the tutorial, I made one step by step as I read along on your directions, and I am thrilled with the finished tab. I just learned about tags this fall and now I can't stop making them :) So much fun! Thanks for sharing the tutorial,
Mary
That is a great tutorial thanks for posting.
I love that tag! Just adorable!
Today I posted about the tag I made with your tutorial, and how you're doing daily tutorials - with a link back to your blog. Thanks again so much for sharing.
Mary
I'm intrigued by the new craft of making tags and am contemplating making some.
Question...the little lady...did you print the design on cardstock paper or regular paper?
Do you use mainly cardstock when creating your designs?
Thank you for your tutorials and tips!
Post a Comment