Today I want to share with you a quick and easy Valentine card tutorial.
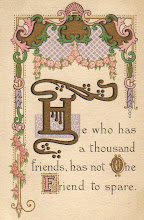
 Start by printing and cutting out this Romeo and Juliet vintage valentine card.
Take a sheet of white cardstock and fold it over to create a blank card. My card measures 5 x 7. Cut a sheet of red patterned paper to be a quarter of an inch smaller than the card and glue to the center.

Take a cream or off white patterned paper and cut it 4 x 5 1/2. Cut grey cardstock a quarter of an inch bigger and glue together giving you a nice small border around the patterned paper.

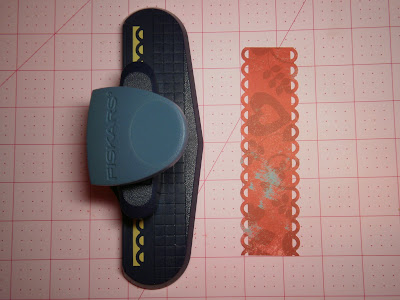
This is one of my very, very favorite tools! It is a must have in my collection!! It is an Apron Lace punch by Fiskars. I found mine at Jo Anns but you can probably find it at most craft stores or it can be purchased here at Amazon.
I took a 1 1/2 x 5 1/2 inch strip and punched along both sides.
I then glued the cream patterned paper piece to the center of the card.

Next I glued the red scalloped strip to the center of the card.

Then cut a 4 1/2 x 5 1/2 inch rectangle out of pink gingham and glued it to a piece of grey cardstock that was 4 3/4 x 5 3/4.
I then cut a piece of dark brown gingham paper 3 x 4 and glued to the center of the pink gingham.

Glue your vintage card to the center.

Glue your vintage card to the center.
Glue that piece to the center of your card.

As a last touch I took three paper flowers in grey,cream and pink and glued to the side of my card. I then took a cute embellishment from a sheet of scrapbook paper and glued that to the center of my card.
 This piece was cut from a sheet of paper from the Cupid collection by Pink Paislee.


As a last touch I took three paper flowers in grey,cream and pink and glued to the side of my card. I then took a cute embellishment from a sheet of scrapbook paper and glued that to the center of my card.
 This piece was cut from a sheet of paper from the Cupid collection by Pink Paislee.
Products used: cardstock: Bazzill
Patterned paper: red paper from Love Bandit collection by Bo Bunny
All other paper by Pink Paislee
Flowers by Prima
Punch by Fiskars
vintage card from my personal collection.
I hope you enjoyed this easy tutorial and I hope I have inspired you to create Valentines for your loved ones this year!
Come back tomorrow for another great super easy and lovely tutorial!!
Have a great day, Lindsey




aaaa.jpg)


.jpg)


.jpg)














21 comments:
So artistic and pretty, Lindsey!I am loving all the Valentine's things. Twyla, your afghan is really nice and soft looking, with a pretty color combo. I love the little dog curled up on your yarn!
Blessings, Sarita
Twyla, We were both night owls this evening! My husband has to wake at 4:30 for a flight, and I wanted him to have a restful sleep. My eyes are nearly closing, I will sneak between the covers without waking him up! What a beautiful card. I learn so much from these tutorials! Have a lovely week as well! Elizabeth
So adorable, Lindsey! What a fabulous vintage Valentine...and I love what you did with it! You always present such wonderful tutorials! Hope you're having a great night!
Absolutely adorable!! You always make things look so easy!
Love,
Marilyn
xxoo
That is so cute! I love the layering effect.
Oh how cute! Romeo and Juliet! So may wonderful layers, Lindsey! Like a depresion era granny, I'm always afraid of running out of paper! ☺
I'm adoring my paper punch! I'm still trying to figure out a way to do all 4 sides of the paper. I know there must be a way!
I really need to find time to make some of these they are just so cute!
Thanks for showing us how to make this fun little valentine Lindsey! I have one of those edgers that I like to play with too.
Lovely choices, it is so sweet.
Beautiful....I can't wait to get home and start crafting some homemade valentines. Love your ideas and vintage valentines.
Thanks for sharing with us!
You probably need another award like a hole in the shoe, BUT an award awaits you two over at my blog if you are inclined to pick it up!!!
Love this tutorial btw. Carol xox
You do such great ones. I always for get to layer when I try. I need to try again! My printer is out of ink so I have to get more before I start more projects! I did finally get out my distress ink and stamp and my my mom had a great time destressing her Valentie box she made yesterday! Thanks for all your help with teh destressing info!
Hugs, Lisa
What a sweet Valentine...love what
you did with it...Thanks for sharing...
Sweet Blessings...
Tonja
Another super tutorial! And I love that tool (I must get one soon)! I think making valentines is one of the sweetest crafts ever. I've always loved it. Years ago, we also used books that had valentines and envelopes to cut out and paste! So wonderful and such fun! Thanks for sharing! Hugs, Coralie
Very Pretty...thank you for sharing.
What an adorable card!! You guys have that special eye.
Oh by the by is that an "A" APRON PUNCH? hehehe
See ya later.
Thanks for your lovely comments about my blog,so sweet of you.What a pretty valentine card.
Bellaboo
You keep coming up with more and more ideas for us
Victoria xx
Hello and thank you for sharing your tutorial to make this cute Valentine. I posted about Valentine's Day today and shared some vintage Valentine cards. I love this holiday, don't you? Thank you so much for stopping by for a visit! Have a lovely rest of the week! Vicki
You both are so talented and so good to share. The tutorial is perfect to learn from.
I love you sweet puppy curled up with all your yarn. My LB likes to be close to me when I am doing a project...
I did the front cover of my Journal...I put it on my blog tonight. Your support is valued, Thank you so much! Hugs, mary
Post a Comment