Sunday, January 31, 2010

Vintage Valentine Paper Bag Album Part 5

Hello Friends. I hope you have all been having a good weekend.
Today I am sharing the last installment of my Vintage Valentine paper bag album.


To start page 9, cut a sheet of patterned paper 5 ½ x 6.


Cut another sheet of paper 5 x 5 ½. This will be your photo mat. Cut a 1 x 6 inch strip. Print and cut Valentine.


I then added photo corners to my mat using Martha Stewart’s photo corner punch. Glue the mat slightly tilted in the center of your page. Take the strip and add glue just to the top and bottom edges of the strip and glue down to your page a quarter of an inch from the left. Add ink around the edges of the page.


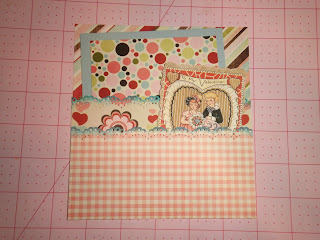
For page 10, start by cutting a sheet of paper 5 ½ x 6.


Cut a strip of paper ½ x 6 and another strip 2 inches. Cut along one of the edges on the 2 inch strip using an edge punch or pinking shears.


Cut a sheet of patterned paper 4 x 5 to create a mat.


Print and cut Valentine.


Glue the mat to the center of your page. Then glue the 2 inch strip to the right edge just along the edges to create a pocket and then glue the ½ x 6 strip on top of that. Then glue the Valentine on to the pocket so that you can still slip a photo in behind the Valentine.


For the back cover, cut a sheet of paper 5 ½ x 6. Ink the edges.


I then cut this piece from a sheet of paper but you could use another Valentine or write the date you made the book. I then added a photo corner in the upper left corner and Prima adhesive pearls in the bottom right corner.


Now I will show you how I laced up the edge of the book. Now the nice thing about these books is that they have already been stitched so that you are not lacing the book to hold it together but merely for decoration. This allows you to get as creative as you want with this. You could use book rings or you could use strips of fabric or tuile.
Here is how is I usually tie mine.


I start with one yard of ribbon so that I will have a big bow. Pull your ribbon through the bottom hole half way.


Then take the piece in the front and wrap it around to the back and pull up through the second hole.


Continue to do this all the way up.


Now turn the book over and repeat on the other side.


Now tie a big bow at the top with the remaining ends.


Now to add a little more detail I cut small strips of ribbon and pull through the holes and tie knots.


I hope you have enjoyed these tutorials! I enjoyed sharing them with you. This week I will share with you a finnished look at the book!
Have a great Sunday, Lindsey

Saturday, January 30, 2010

Part 4 of my Vintage Valentine Paper Bag Album

Hello Friends. Today I am sharing part 4 of my Vintage Valentine paper bag album.


For page 7, start by cutting a sheet of patterned paper 5 ½ x 6.

Next cut a sheet of patterned paper 4 x 6. I then took this Martha Stewart Lace edge punch and punched along one side. I then cut a sheet of patterned paper 3 x 6 and punched along one side. I took Aqua blue ink and inked along the lace edges to make them stand out more.


Now add glue just along the straight edges of the 3 x 6 piece. Not in the middle or along the punched edge. Glue to the other piece, making sure to match up the straight edges.

See how this creates a pocket?

Add glue along the edges of the 4 x 6 size now just as you did with the other piece.
Glue to the bottom of your page with the punched edges facing up.


Cut a sheet of patterned paper 4 x 5. Cut a sheet of cardstock 4 ½ x 5 ½ . Glue together to create a photo mat.


Print and cut Valentine featured at the top of the post.

Place the Valentine in the bottom pocket and the mat in the top pocket. Now add ink around the edges of the page. Now on the front of the bottom pocket you can add journaling, photos or another Valentine image.


For page 8, start by cutting a sheet of patterned paper 5 ½ x 6.


Now just like the last page we are cutting and punching along the edges of the patterned paper. One 3 x 6 and one 4 x 6. Add blue ink along the lace edge.


Now glue together making sure to match up the straight edges.


See how we are creating pockets again? This is the same basic layout style but we are gluing it on to the page sideways so that it matches the last page but has such a different look.

Cut a sheet of patterned paper 4 x 5. Cut another 3 ½ x 4 ½. Glue together to create a photo mat and tuck into the back pocket. I am using my favorite glue stick which can be found here.


Print and cut Valentine.


Tuck into the front pocket and go around the edges of the page in blue ink.


Thank you for stopping by! The last installment of this album tutorial will be posted tomorrow!

If you would like the paper I used to create this album, It's the Cupid Collection by Pink Paislee. You can find a few sheets of it here and here or at your local scrapbook store.

Hope your having a great weekend, Lindsey

Friday, January 29, 2010

The Key to My Heart

Hello Friends!  In the latest Somerset Life, there was a picture of keys wrapped in thread that really appealed to me.  I decided to wrap pretty colors of DMC around several of my skeleton keys.
I think they are pretty.


For you today we have a vintage Valentine featuring a key.


Love the banner on this one!


As always, it's a pleasure to share with you today. 
I hope you've enjoyed your visit here.
Wishing you much happiness!
Twyla

Thursday, January 28, 2010

Vintage Valentine Paper Bag Album Part 3


Hello Friends, Today I am sharing pages 5 and 6 of my Vintage Valentine paper bag album.
First start by printing and cutting this sweet Valentine. I print my images on heavy cardstock that can be found in the printing section at Wal Mart.


Cut a sheet of patterned paper 5 1/2 x 6.


Cut a sheet of cardstock 4 x 5. I then cut photo corners using my Martha Stewart corner punch and cut 4 corners and glued the photo mat to my page.


I then added the little Angel to my page by setting her in the photo corner.


I then took a 1 x 5 strip of patterned paper and cut the ends to create a little banner. I then added "Valentine" using Martha Stewart's Valentine Glitter letters that I found at Michaels.


Add Aqua blue ink around the edges of your page and it's finished.


For page 6 cut a sheet of patterned paper 5 1/2 x 6.


Cut another sheet of patterned paper 5 x 7 1/2. Fold over 2 1/2 inches.


Glue a different patterned paper onto the flap measuring 2 1/2 inches. Add another patterned paper measuring 2 x 4 1/2 and glue to the center


Print and cut this Valentine.


Glue your vintage Valentine to the middle of your flap.


I then added photo corners using Martha Stewart's photo corner punch to the top and bottom corners on the left side.


Here is what your piece should look like so far. Now take your piece and glue to the center of your page.


Now when you open the fold you can add extra Valentine's or a hidden message to the special one receiving this album or more photos. I added this simple sentiment to the bottom using Martha Stewart's Valentine glitter stickers that I purchased at Michaels.


I hope you enjoyed the 3rd installment of this album!
Have a great day!
Lindsey