Wednesday, November 30, 2011

Giveaway Winner!


Hello dear friends!
Today we're sharing this beautiful vintage Christmas
card with you.  The colors are dreamy!


We hope you are enjoying the tag tutorials. 
Lindsey will be back with more soon!


It's time to announce the winner of my house shoe
giveaway!  It's Colleen, the Amazing Mrs. B. of
Congratulations Colleen!


Thank you all for your sweet comments and
support of our Sugar Kissed Christmas posts.
We are enjoying bringing you crafts
and ideas to make the season magical.
Love, Twyla and Lindsey


Monday, November 28, 2011

Christmas Tag Tutorial #2


Hello friends!
Here is the second of my Twelve Tags of Christmas.
A tree shaped tag!


I started by cutting out a tree shape on to cardstock. Punch a small hole at the top for your ribbon.


I then took Tim Holtz snowflake tissue tape and covered the tag.
You can find his tissue tape at most craft stores. You could also stamp snowflakes across the tag.


Now cut off the excess tape.


Ink the tag lightly with red ink.


Fan fold a small strip of paper to create a paper rosette.


Glue rosette to the lower center of the tag.


Then cut a small paper scallop for the center of the rosette.
Tie red ribbon through the top of the tag and tie into a bow.


Add a Christmas sentiment to the center of the rosette and glue chunky white glitter around the edges of the tag. I used Martha Stewart's Snow glitter.


It's done!
I hope you try making a shaped tag!


Wishing you a lovely Tuesday, Lindsey

Christmas Tag Tutorial #1

Hello friends!
Today is the beginning of a 'Twelve Days of Christmas' tag series!

Here is tag number one!


First, start by printing and cutting out this sweet vintage image.


I am using a manila tag that measures 3" x 6". I inked it with Vintage Photo Distress Ink to look aged. 2 strips of red cardstock punched with a Martha Stewart border punch are glued to the ends of a piece of scrapbook paper by October Afternoon and glued to the center of the tag. Glue the image onto the tag but don't put glue all the way to the edges as you will be tucking in embellishments under the edge of her dress.


I cut a white paper scallop and adhered a scalloped sticker from October Afternoon to the center. Add a Christmas sentiment to the center and glue scallop to the tag, tucking underneath her dress and arm.


To add more detail, I used red glitter glue to outline the inner scallop. I recommend Martha Stewart's Glitter glue.


I then took mini adhesive white pearls and added them around the red scallop.


I took a snowflake button (found at Hobby Lobby) tied with a pink bow and glued it between the dress and scallop. Another strip of red cardstock punched with a border punch was added along the bottom. I also used a white gel pen to add stitch lines around the edge of the tag.


A sparkly little chipboard poinsettia finishes off the bottom of the tag.


Add a bow to the top of the tag to finish it.
I made my bow by dying seam binding with Spun Sugar distress ink.
If you would like some of the seam binding but don't want to make it yourself, check out our etsy shop where I have listed this some in our Sugar Kissed colors.


I hope you have enjoyed this tutorial!


Wishing you a lovely day, Lindsey

Sunday, November 27, 2011

Christmas Giveaway

Hello dear friends!
It is our pleasure to give away a pair of
my handmade house shoes!
They are perfectly sugar kissed in pink and red.
Just leave a comment on this post to be entered to win.


Winner will be announced Wed., Nov. 30.

Also for your pleasure, an adorable vintage Christmas
image.  Enjoy!


Have a most blessed Sunday!
Twyla and Lindsey


Saturday, November 26, 2011

Christmas Place Marker Tutorial

Hello friends!
Another tutorial to share with you today!
A festive Christmas decoration or a place marker for your table, it's sparkly and cute!


The base is a small wooden spool found at a local craft store.
I inked it with Vintage Photo Distress ink to give it an aged look.


Wrap a piece of ribbon and glue to the spool. Now head out in your yard and pick up a few twigs. Cut one to desired size, I cut mine to be about 9 inches.
Place down in center of spool and glue to adhere.


Cut a couple holly shaped leaves from sheet music and color with green ink.
Cut a 3 inch paper scallop or circle from scrapbook paper and a paper snowflake.


Cut a 1 1/4 x 3 1/2 inch banner shape from pink cardstock.


Glue banner to center of scallop.


Then glue the holly leaves and snowflake to the center of the scallop.


Then add a paper rose to the center. I found a lovely set in sugar kissed colors at Michaels.


Add silver glitter glue around the edges of the banner shape to add more sparkle.


Write names or stamp a Christmas sentiment to the center of the banner.


I used masking tape to attach the twig to the paper scallop.


Glue another scallop to the back to finish off the back.


It makes a great display on the shelf!


Have a lovely day, Lindsey


Friday, November 25, 2011

Christmas Decorating

Hello friends!
A quick and easy decorating idea to share today!


Stack 2 books together and tie together with a bow.
Take alphabet stickers and write "Merry Christmas" along the edges of the books.
Cut holly leaves from sheet music and ink them with red and green ink to add around the bow. Top it with a vintage ornament and Christmas figurine or special memento.


Looks very festive and then when Christmas is done, you can pull off the stickers and put your books back on the shelf!


You could also pick out special books
 and give this as a festive gift for a  book lover!

Have a lovely day, Twyla and Lindsey

Thursday, November 24, 2011

Happy Thanksgiving!

Dear friends,
We are so thankful for our family and all our wonderful blog friends!


Many blessings are wished for you and your families.


Enjoy these sweet vintage postcards!

 Twyla and Lindsey


Wednesday, November 23, 2011

Paper Tree Tutorial


Hello friends!
Today we are sharing a quick and easy tutorial for a paper tree.
Perfect project to make with your kids or grandkids, it's so easy!


Cut a variety of scallops or circles out of cardstock.
I used 9 scallops, but feel free to cut more for a fuller tree.


Then cut or poke small holes in the center of each scallop.
You want the holes to be very small.
I just eyeballed the center of each scallop, mot minding if the were a little uneven, as it added a little whimsy to the tree.


Then with a pipe cleaner, string on your scallops, starting with the biggest and layering them down leaving a small space in between each one.


For the base of the tree, I used a small wooden spool that I picked up in the wood section at a local craft store. I then glittered it and covered one end with paper to cover the hole so that your pipe cleaner won't go all the way through the spool.


I then set the pipe cleaner down in the hole, which didn't require glue to stand but if you want it to be a little more sturdy then you can add glue to the pipe cleaner before inserting it in the spool.
I then added a star shaped stick pin to the top for my tree topper. You could also cut a star from paper and glue to the top.
It's done! Although I decided after finishing it that it would be pretty to glitter the edges of each scallop before stringing them on the pipe cleaner for a more festive style. There are so many ways to dress these up and try different shapes to get different looks such a triangles or a square tree.
I hope you enjoyed this tutorial and give it a try!


Wishing you a lovely day, Lindsey


Tuesday, November 22, 2011

December Daily Tutorial - Part 1


Hello friends!
This first tutorial for the Christmas season is something most people want to have done before December even comes! It's called a December Daily. You may have heard of them or have made one in the past. They are mini albums numbered with 25 pages which you fill with a photo every day in December.


They are a great way to remember the traditions and fun family memories every day!
I started by cutting paper for my book. I chose a random mixture of old and new papers which I cut to 5 1/2 x 7 1/2 and then glued two sheets together for each page so that I would have a more sturdy book.


Then bind your book by punching holes and adding binding rings or spiral rings.


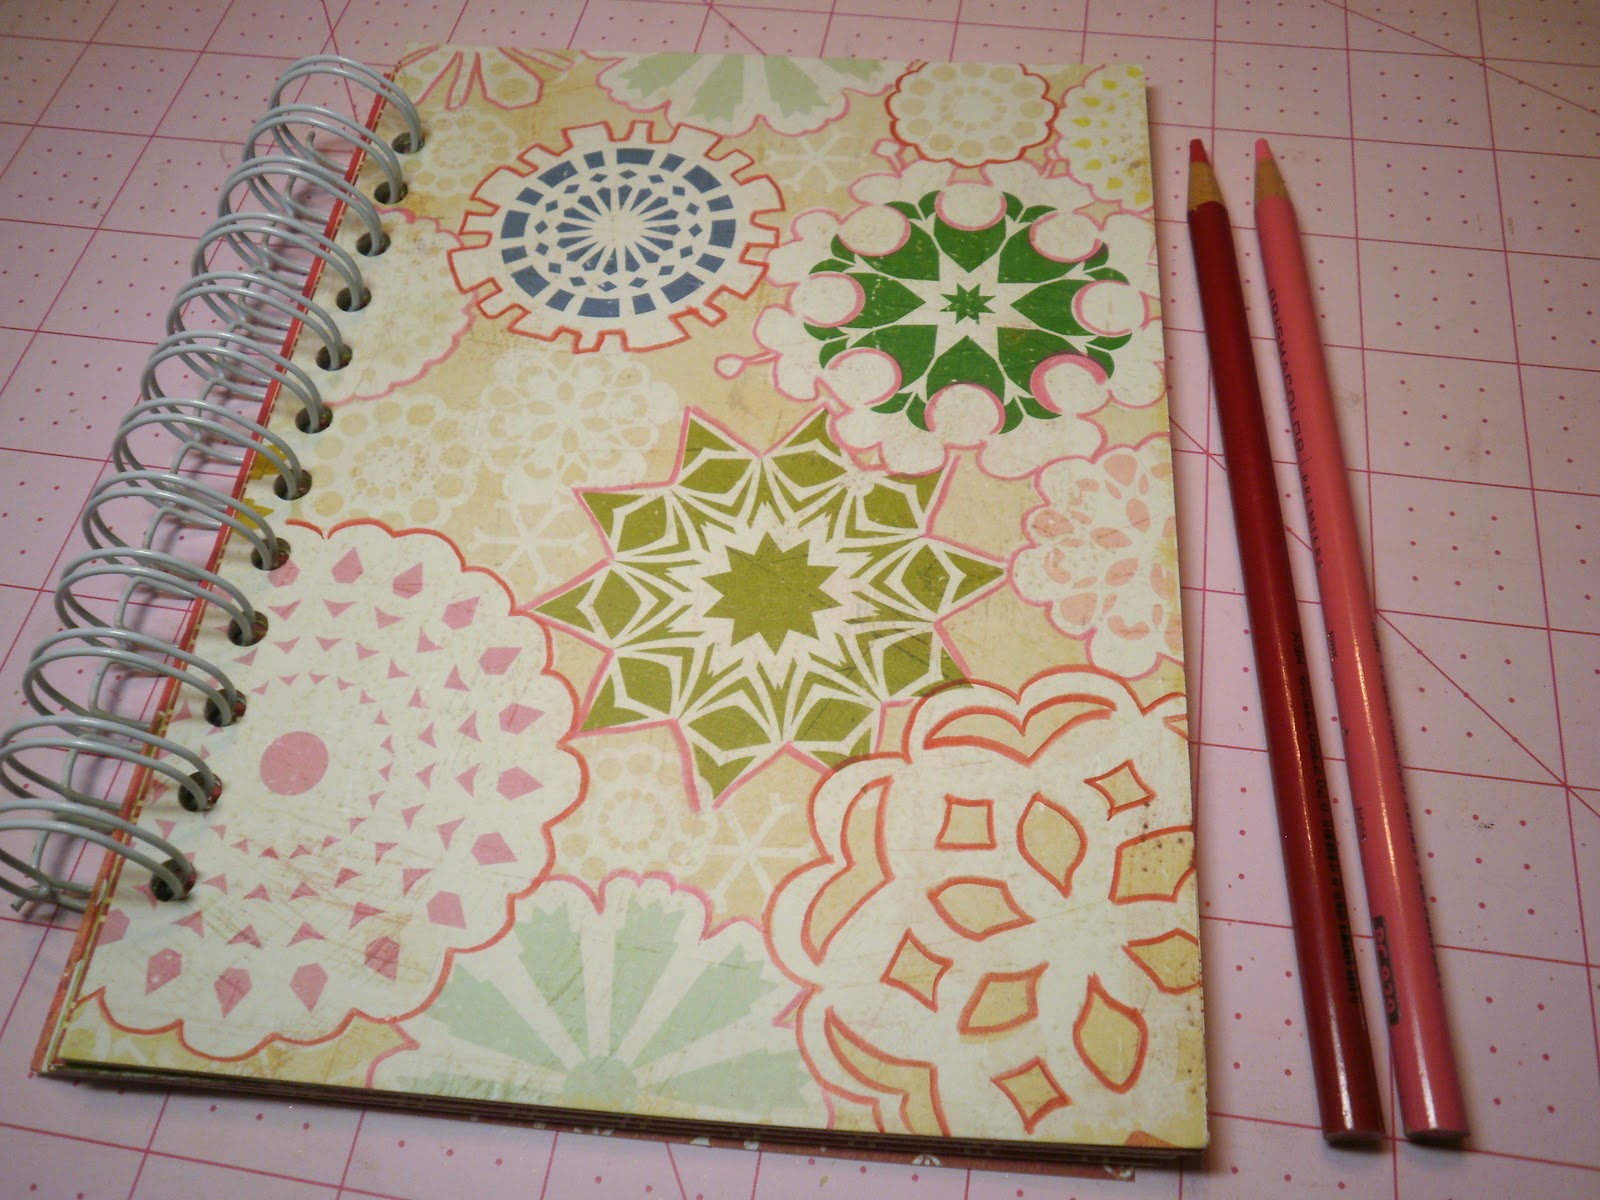
The paper I used for the cover is from Crate Paper's new Christmas line. I loved the fun doily style but I wanted to give the book a more unique look, so I took pink and red colored pencils to add more detail.


I then started layering pieces for my cover such as a pink tree, white doily and chipboard stickers.


Now what I thought made this album such a great idea is that it is the PERFECT way to use up scraps!
If you're like me, you have tons of little strips of paper, sticker sheets with only 1 or 3 stickers left or a pile of chipboard and die cut  leftovers that you just couldn't throw away!


So pull out your stash and layer your scraps up to make this album!


You can make this album as busy or as simple as you want. Just make sure you have room for at least one photo per page. You can also use stamps to add more detail to your pages.


Each page is numbered for the day in the month. You may also want to leave some room to add a little journaling about what you were doing that day.


I have so many extra little pieces that was great to finally be able to use up and enjoy!


These albums would be so cute to fill with photos of your children every day
and then give as gifts to your family!


This is a really easy project to complete! It only took me a couple days to decide how I wanted to fill my pages.


It's also a great way to make sure you do something holiday related every day of the month. Even if it's just a photo of your favorite ornament or storybook!
Because of how many pages their are in this book, I am breaking this post up into two.


Have a lovely day, Lindsey